CREATING A GRID WITH BEAMS, COLUMNS, MARKERS, & DIMENSIONS
The Tools/Structural Grid… command allows you to create a custom local grid. Optionally, you can populate the grid with beams and columns at grid intersection points. The command is only available in the Floor Plan Window.
Placing the Grid
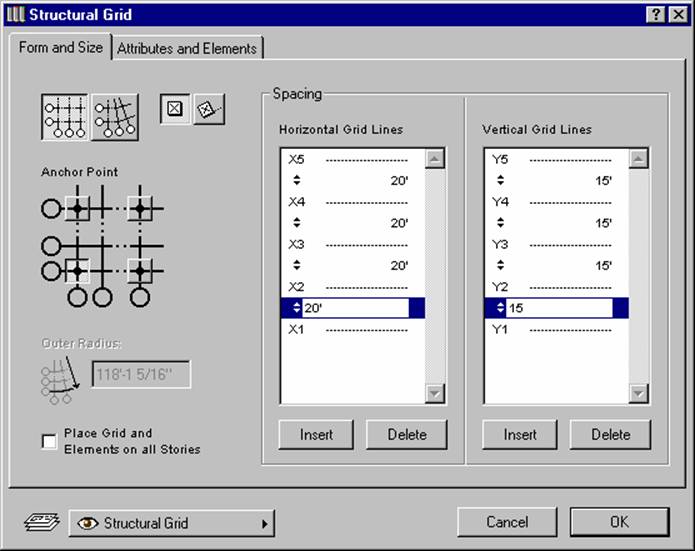
When you choose the Structural Grid… command, a dialog box opens. Make the settings you need and click the OK button. A ghost form of the grid appears. With the help of the zooming and panning controls, find the planned location of your grid on the Floor Plan, and then click to place the grid.
Bring up the Structural Grid Dialogue box from the “Tools/Structural Grid” pull down menu command. Lets set up a 20 x 15 grid for our building.
We will just place the grid on one story. There is a switch box that you can check to place the Grid & Elements on all stories if you choose. Once you have set the spacing and the number of bays, select the “Attributes and Elements” tab to further set up our grid. We can now set up the grid attributes along with what elements we want to generate. Keep in mind that the elements generated by this tool will use the individual tools default therefore if you want round columns you should adjust the defaults for the column tool to reflect the desired settings. We will choose to generate beams, columns, and dimensions so the default settings should be reviewed prior to setting up the structural grid.
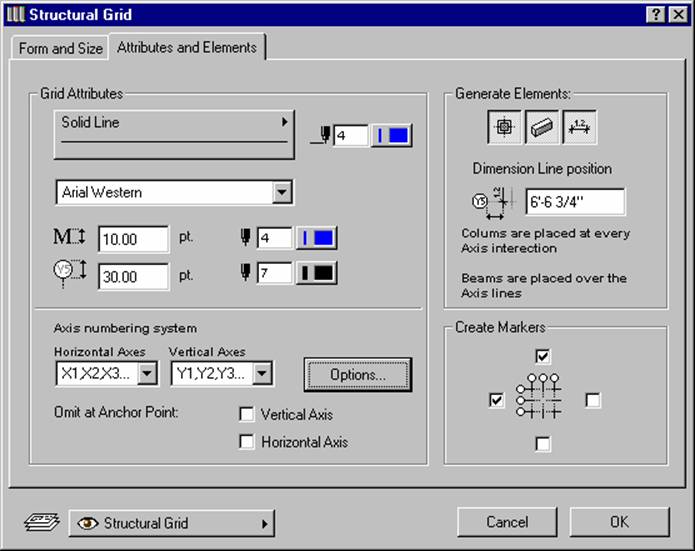
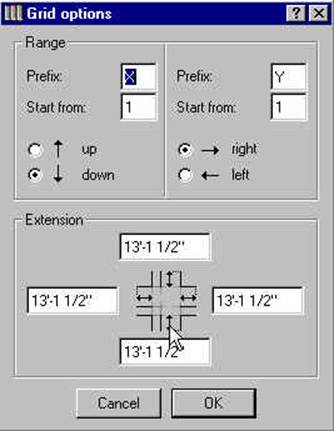
Selecting “Options” button will allow you to establish the axis labeling options. Select the “down” & “right” options and press “OK”. Push in all three radio buttons to Generate Elements of columns, beams, and dimensions. In this example we have chosen to create markers on the top and left sides and then select “OK”.
After you press “OK” a ghost image of the grid appears on the screen and you can anchor the grid in the desired location. Perform the mouse click to anchor and the grid objects are placed. Using the marquee tool we can place a fence or marquee around the new grid and look at the elements in 3D to see what we have just built.
ABOUT THE AUTHOR