Creating a Custom Door Panel
Creating a custom door panel in ArchiCAD (From the v8.0 R3 library and later versions such as 8.1) is now an easy task.
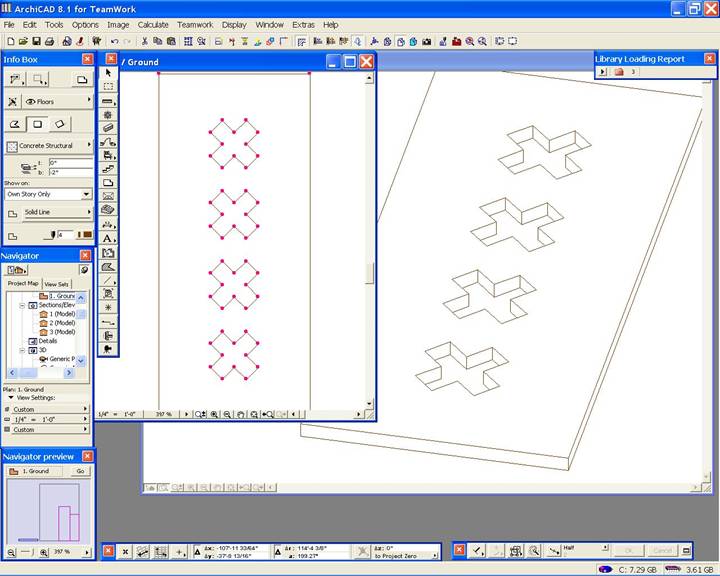
First create your door panel with ArchiCAD tools, such as the slab tool as in our example, and save the design as an object.
We made a 3x7 slab 2” thick with the desired openings in the panel and selected the slab to view in 3D and to save it as an object.
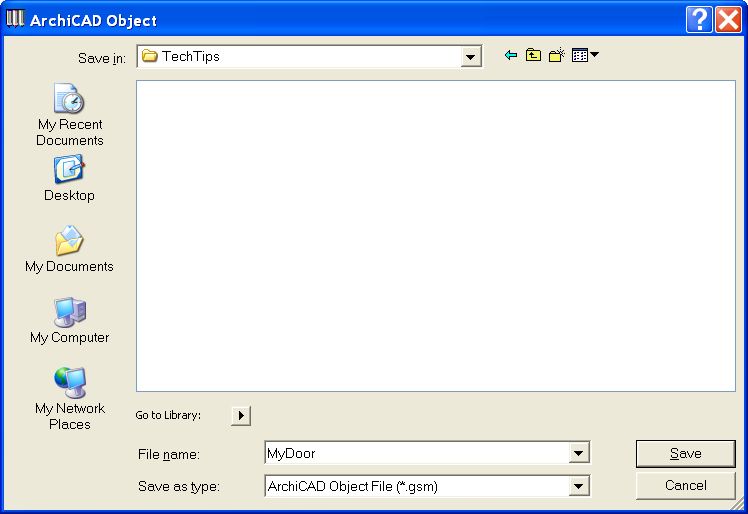
We then saved the Panel Design Slab as an object by selecting “File” – “GDL Objects” – “Save Selection As…” and then naming the object and placing it into our Library Folder. Be sure to make note of the name and location of this newly saved object for the next steps.
Once our slab design is saved as an object we then went to Library Manager and loaded our object/folder into the project file.
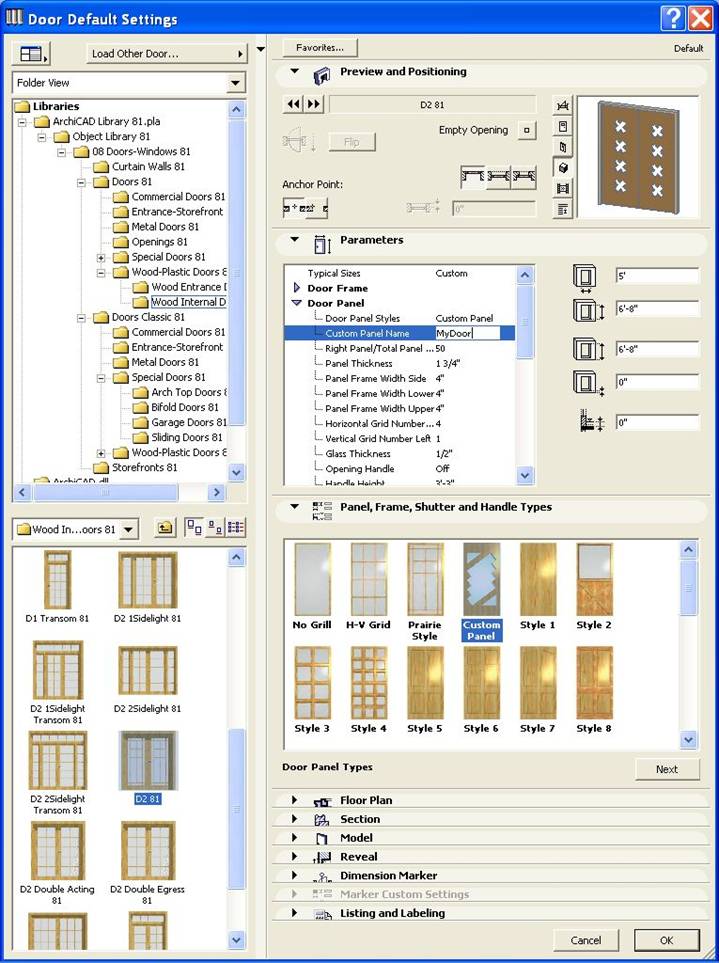
We then went to the default settings for the Door Tool and selected one of the doors that contains a Custom Panel parameter option. Note that the Commercial Doors, Entrance & Storefront, Metal Doors, Wood & Plastic Doors – Entrance & Internal Doors have a Custom Panel option. (Not the Classic series or older parts) We then selected the Custom Panel Type and inserted our exact object name (without extensions) that we had just created. Our custom panel doors are now ready to use.